1. Open the Product for Editing
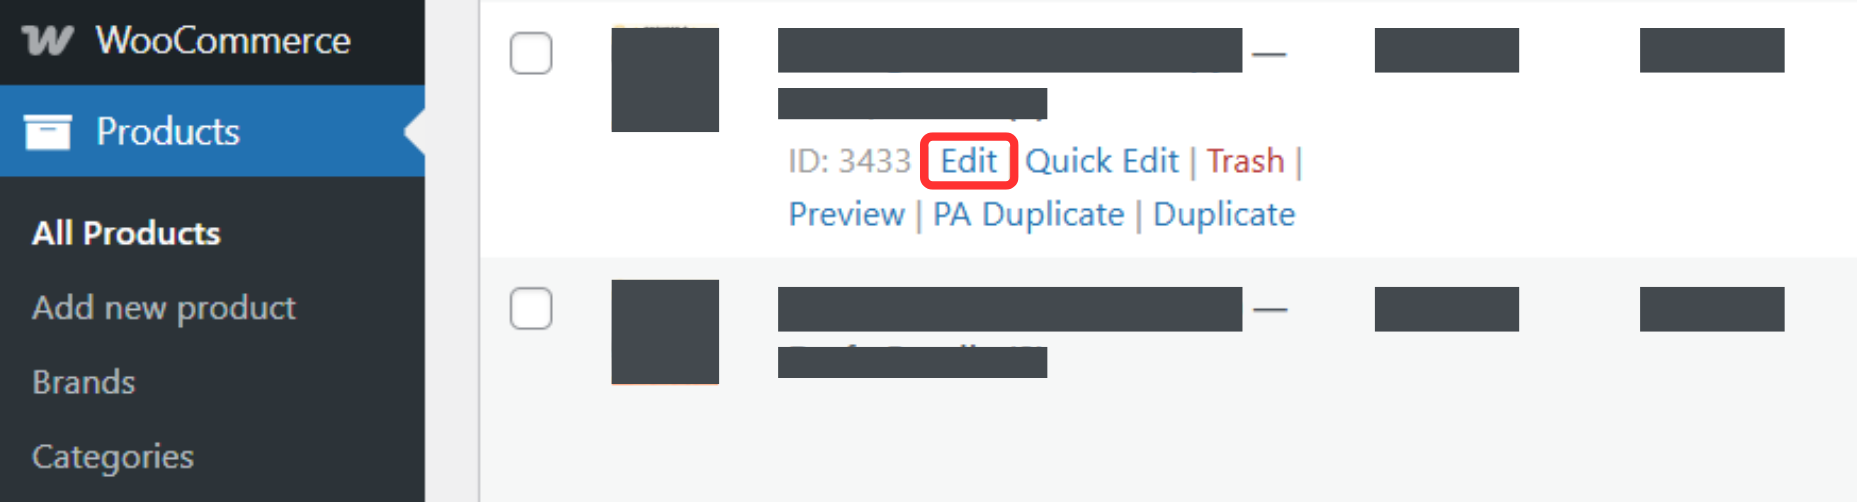
From the WordPress dashboard, click Products.
Select All Products.
Click Edit on the product you want to add variations to.
2. Switch Product Type
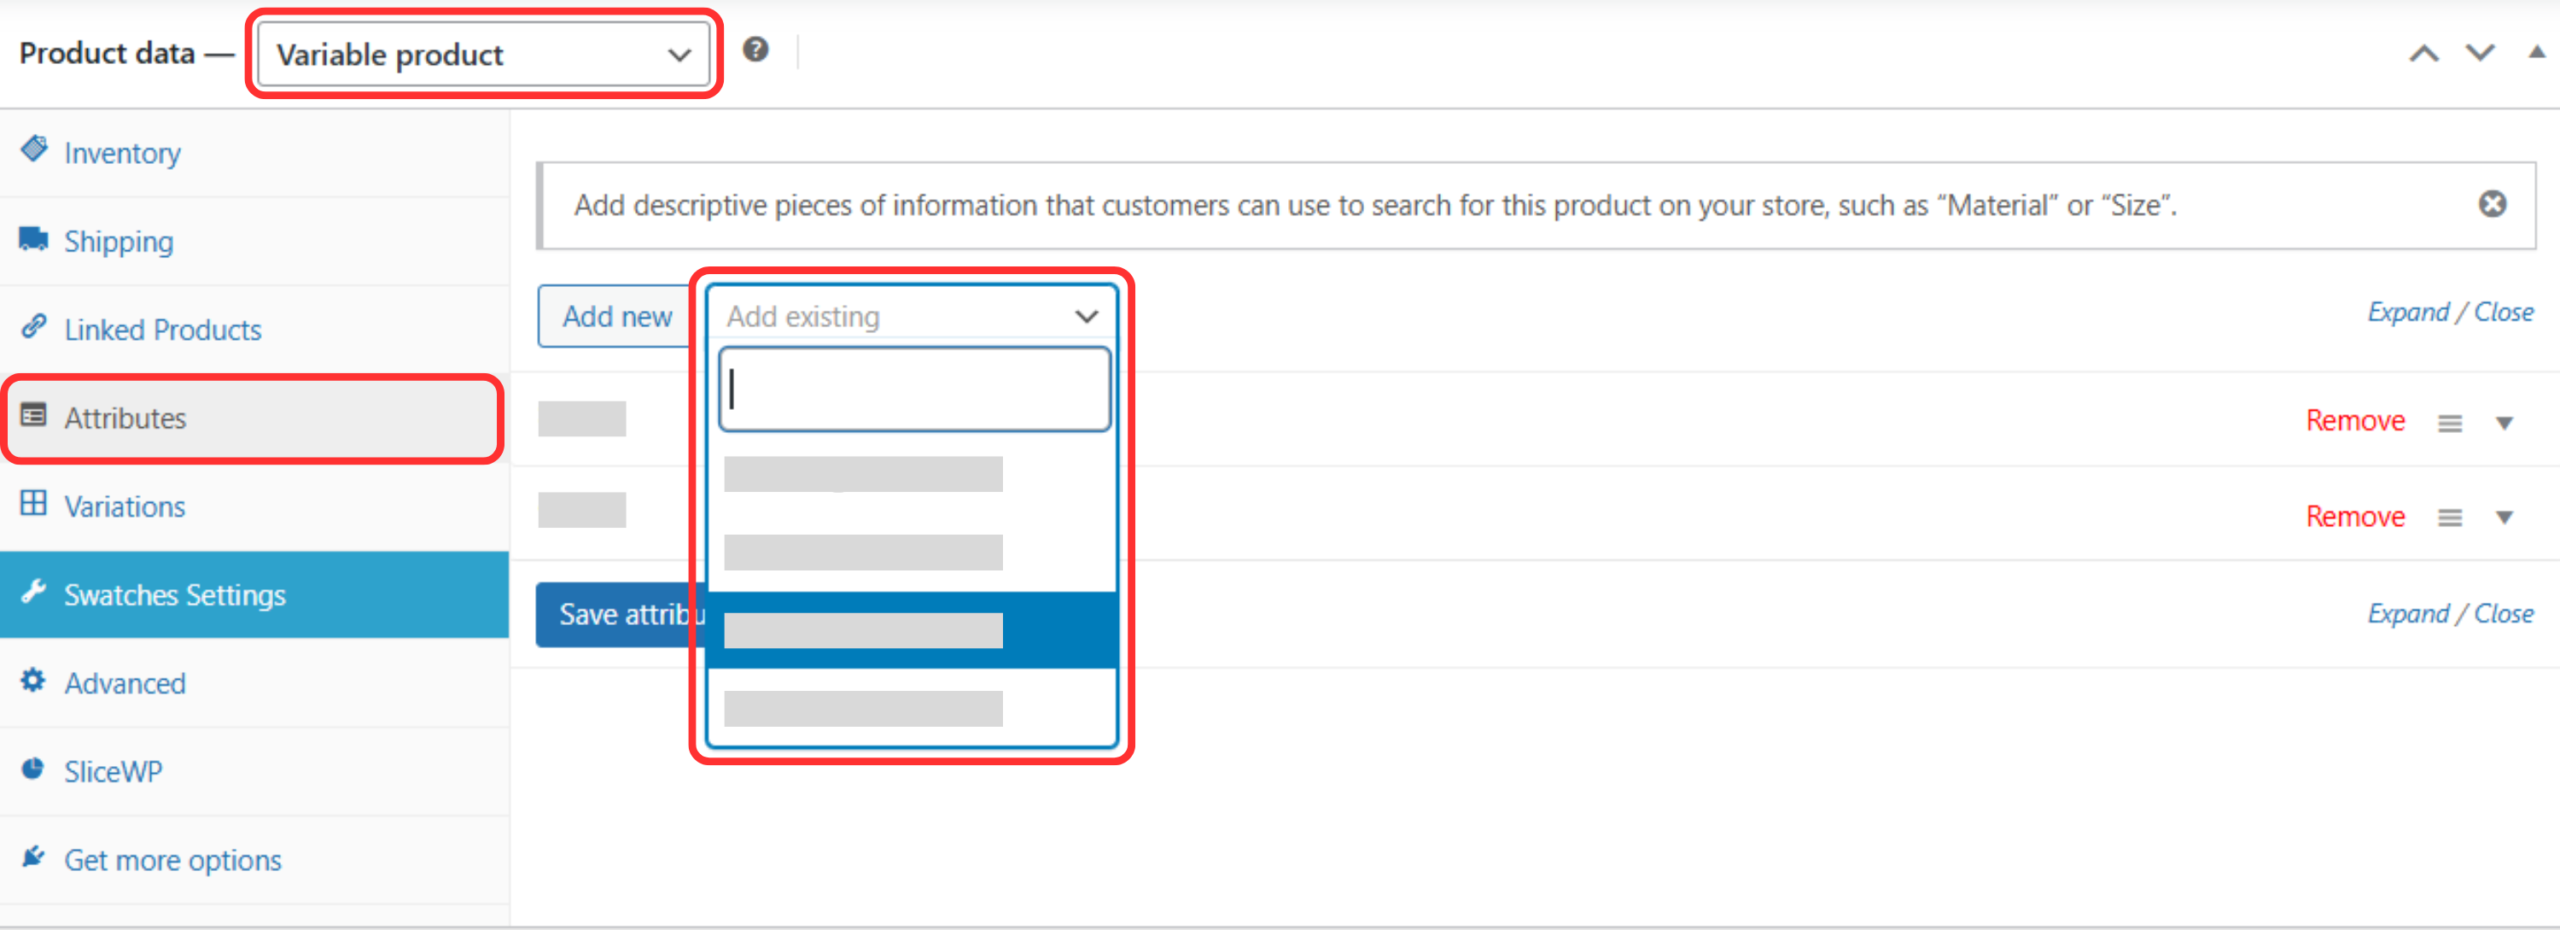
Scroll down to the Product data section.
From the dropdown, select Variable product.
3. Add Attributes to the Product
In Product data, click Attributes.
Click Add new.
Enter the Name
Example: Size, ColorEnter the Value, separated by a vertical bar
|
Example: S | M | L or Black | Beige | BlueTick Used for variations.
Click Save attributes.
4. Create Variations
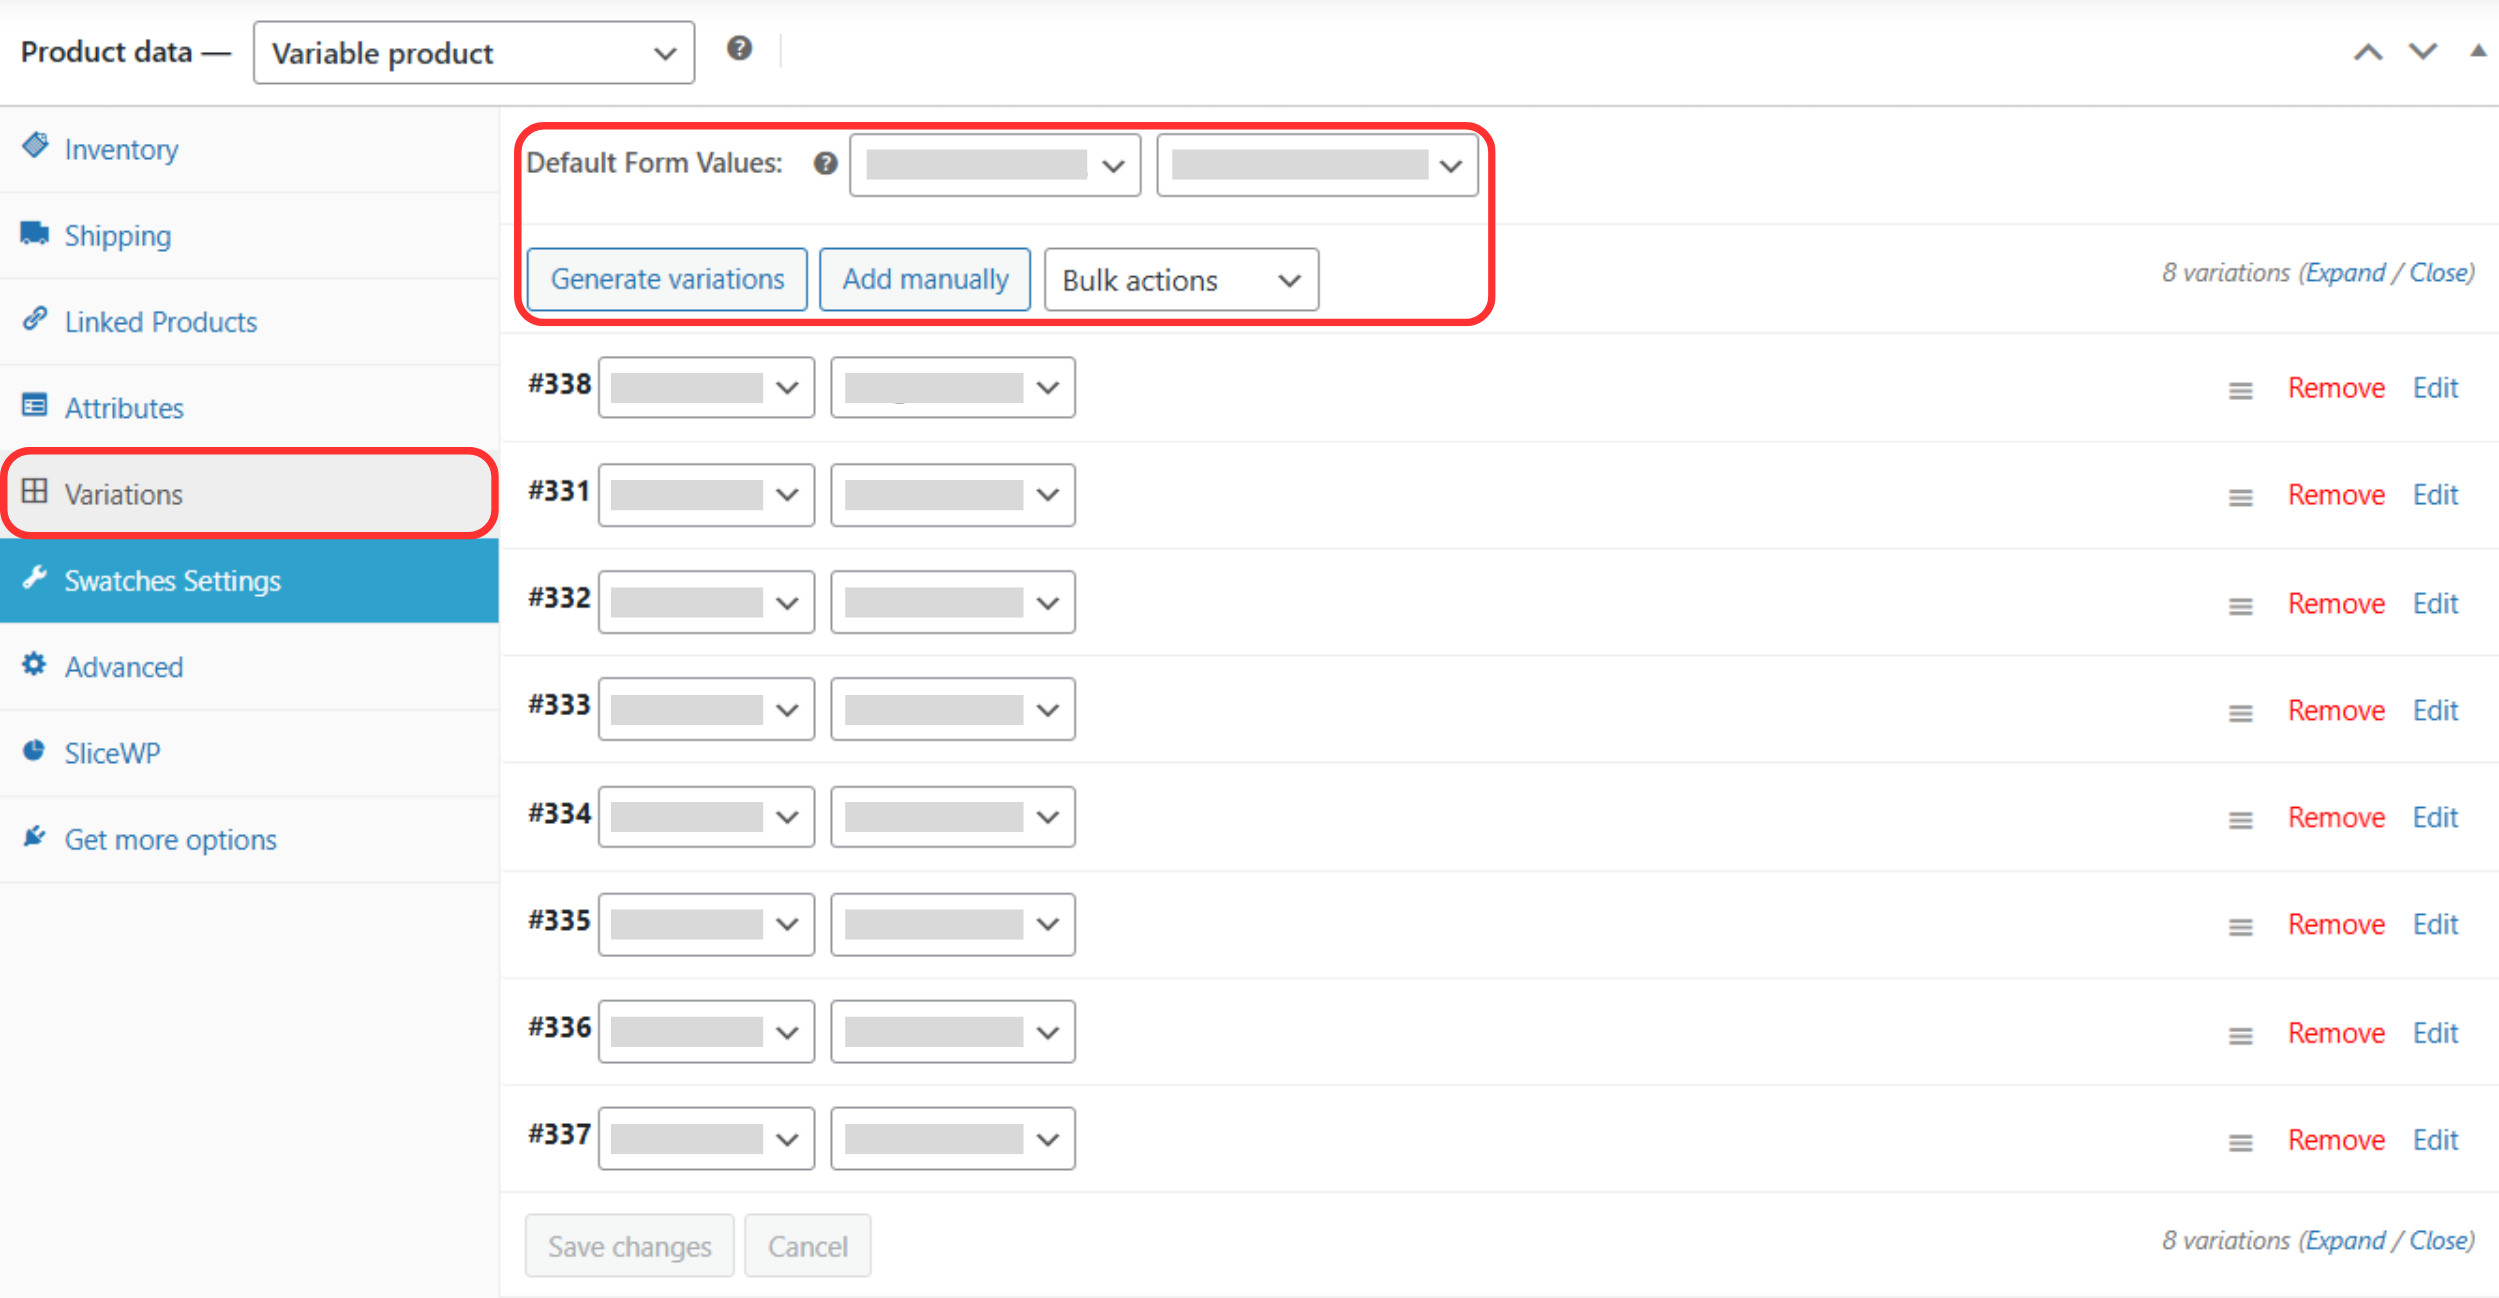
Click the Variations tab.
Click the dropdown and choose:
Generate variations (auto-create), or
Add manually (create one by one)
Click Go if prompted.
5. Configure Each Variation
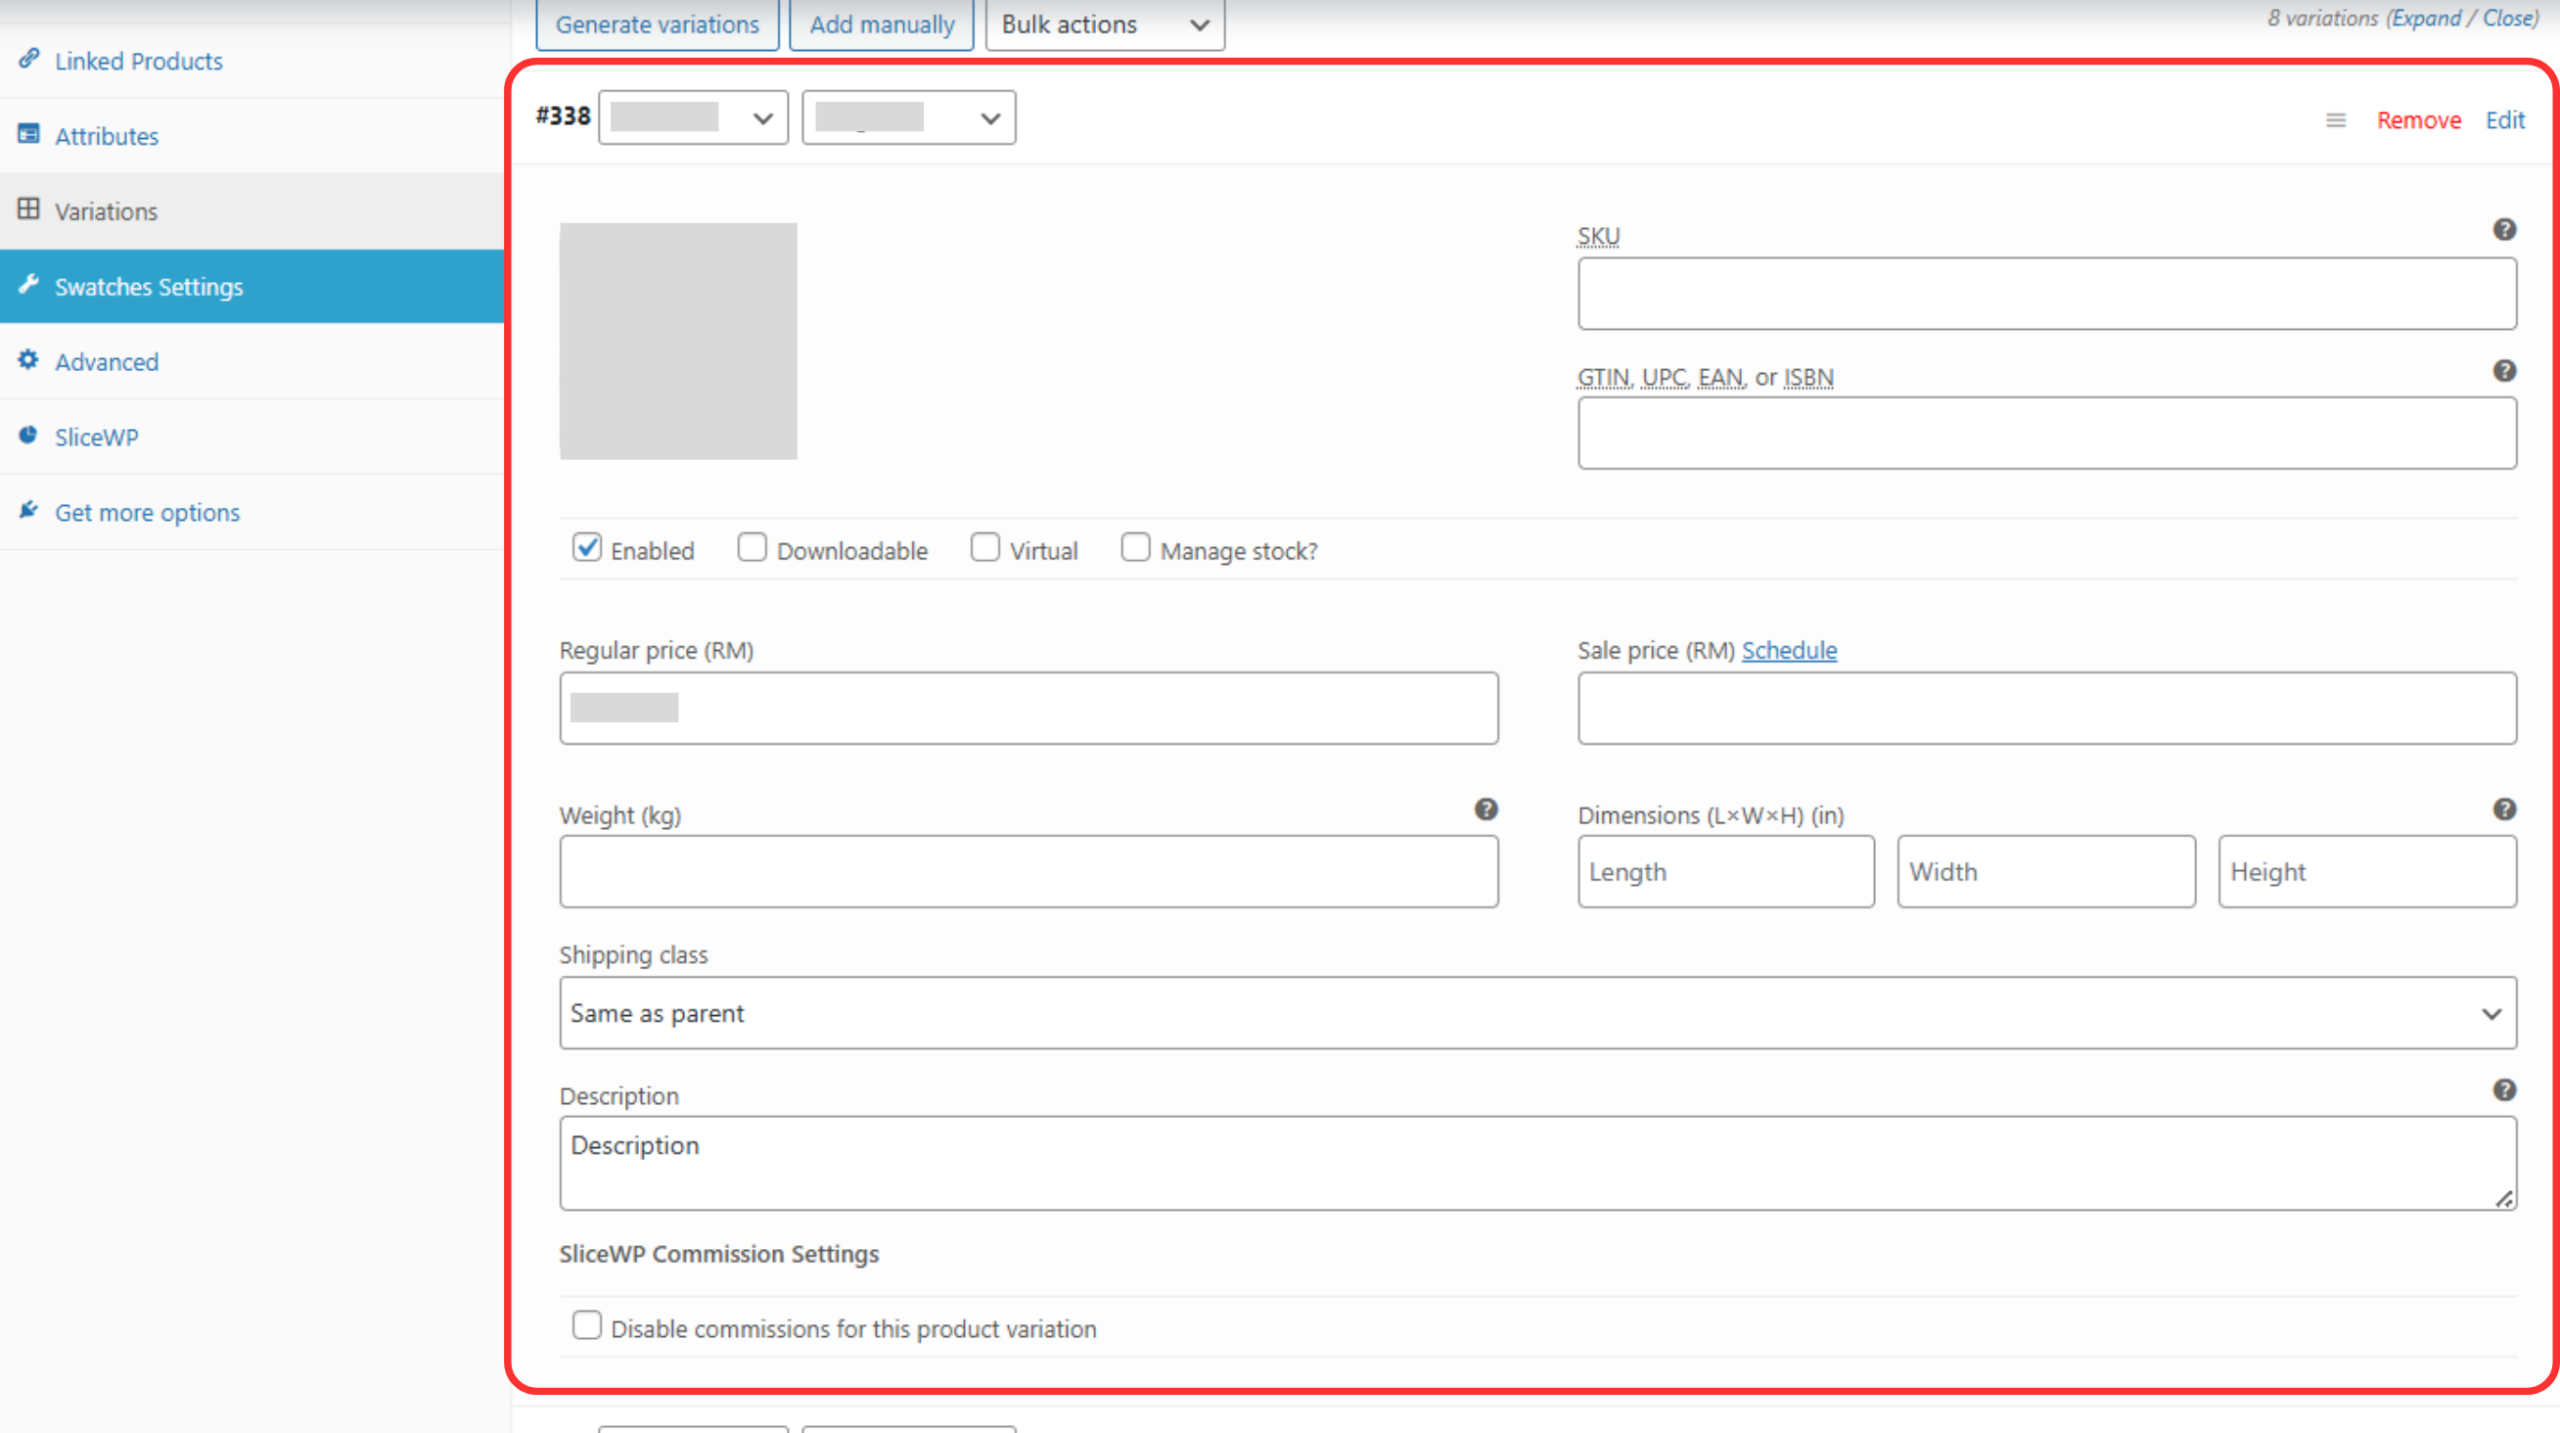
Expand a variation by clicking the arrow.
Fill in required details:
Price
Sale price (if any)
Stock status / stock quantity
Repeat for all variations.
6. Save Changes
Click Save changes inside the Variations tab.
Scroll back to the top.
Click Update to publish the changes.